I really don’t like letting any food items go to waste. It just seems too unfair considering there are so many people in the world less fortunate than me who would appreciate any leftovers. So when I have more eggs than I can eat, half a packet of double stuffed Oreos (which wouldn’t go to waste but would most likely get eaten in one go resulting in days of self-loathing for it), some butter and half a tub of double cream, I bake. Like any self respecting baker, I am rarely out of flour, sugar and dark chocolate, which of course helps.
As if by request, Smitten Kitchen had just posted a recipe for lush brownies with only 5 ingredients which I automatically decided to pimp with the cream and Oreos. I crushed the Oreos and put them on the bottom of the paper cases, and the cream I whipped and piped on top. I have so far made them twice and even the pickiest brownie eaters were impressed with the part brownie, part muffin creation.
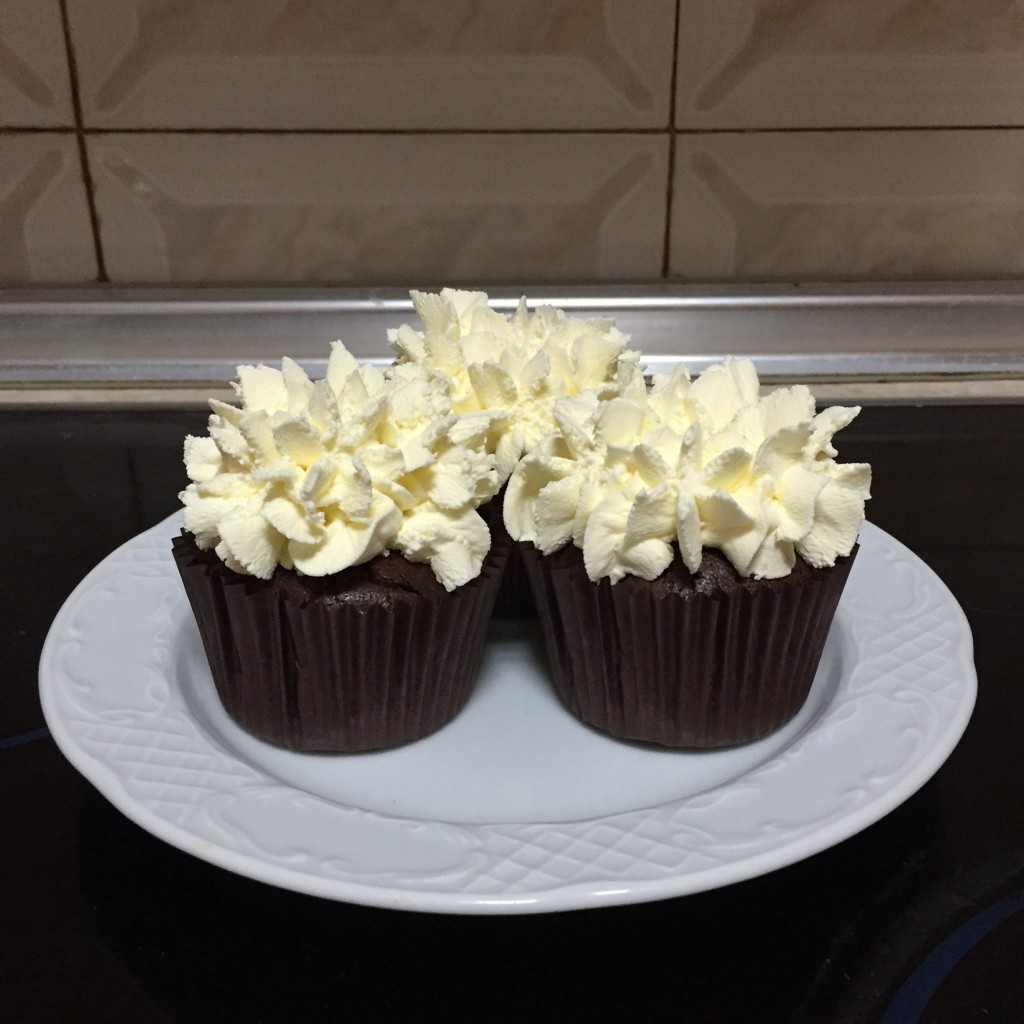
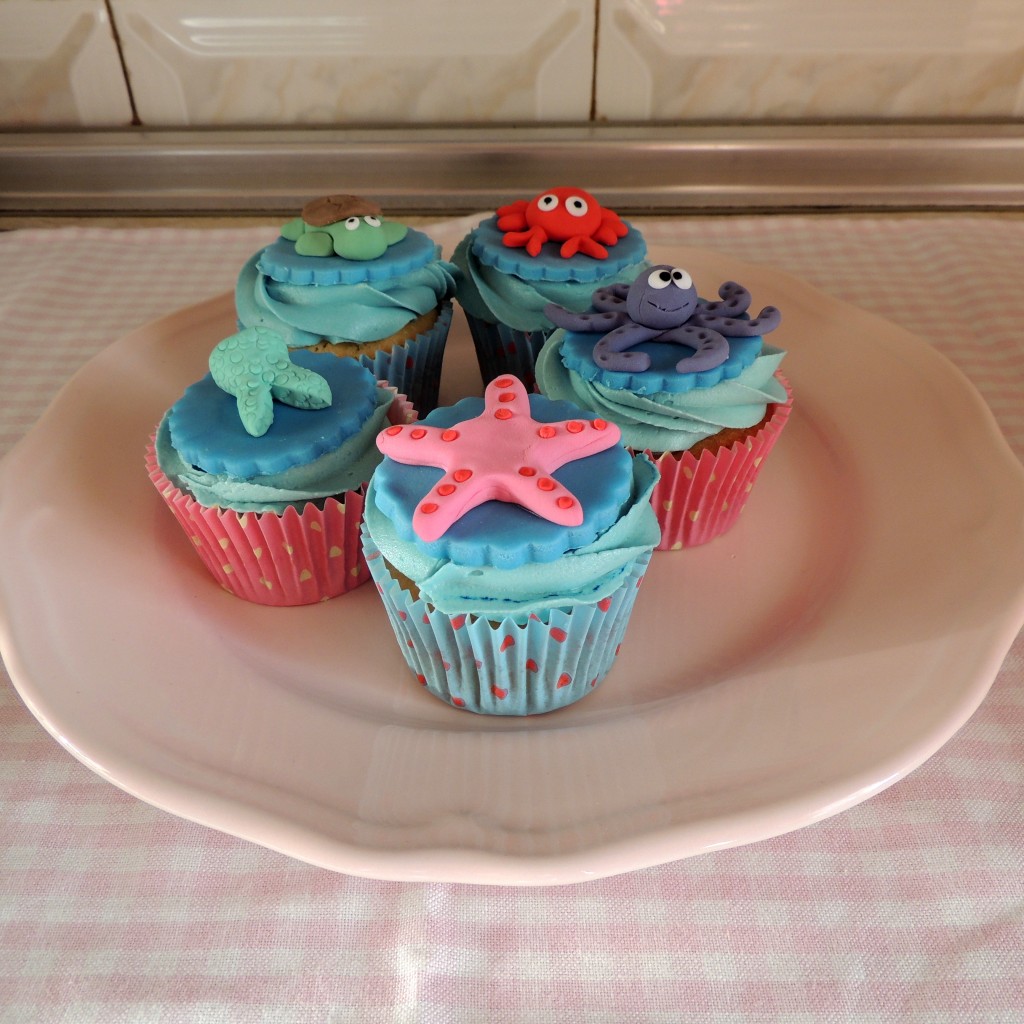
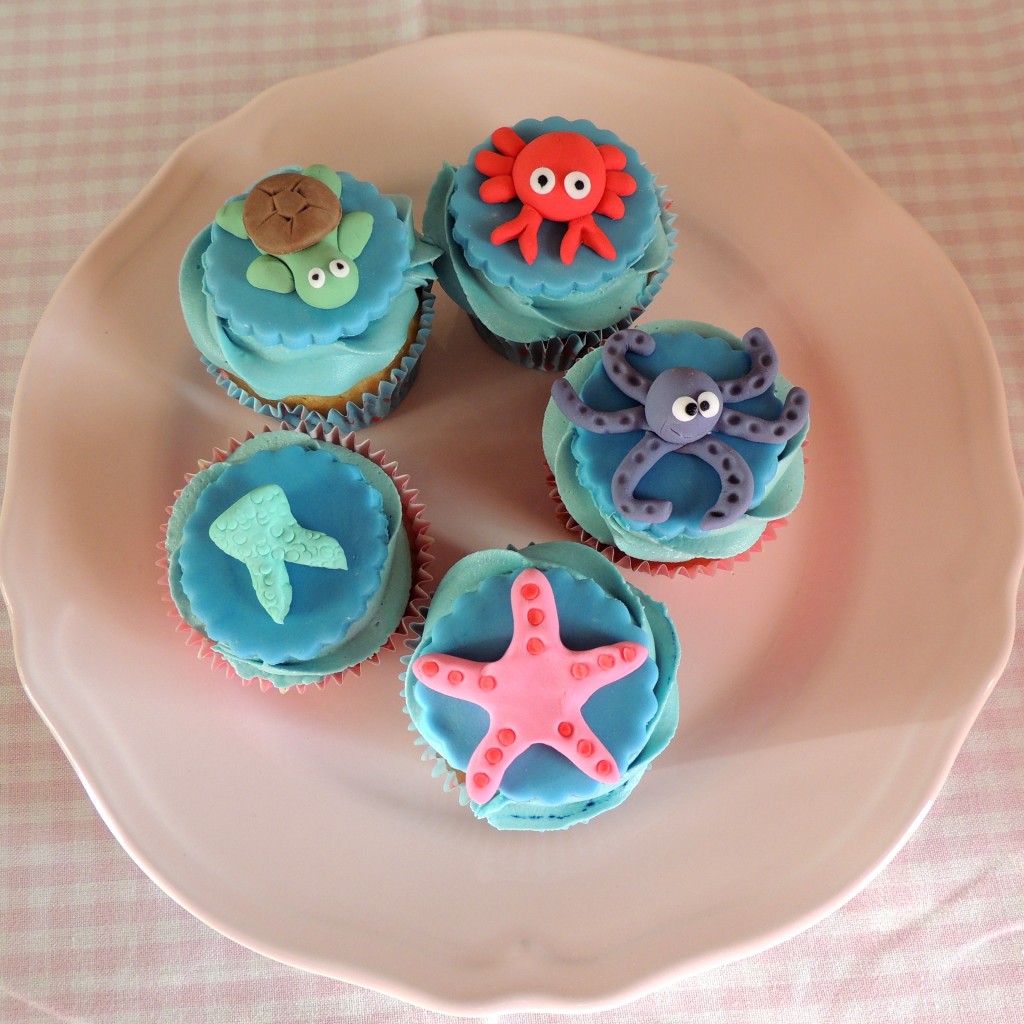
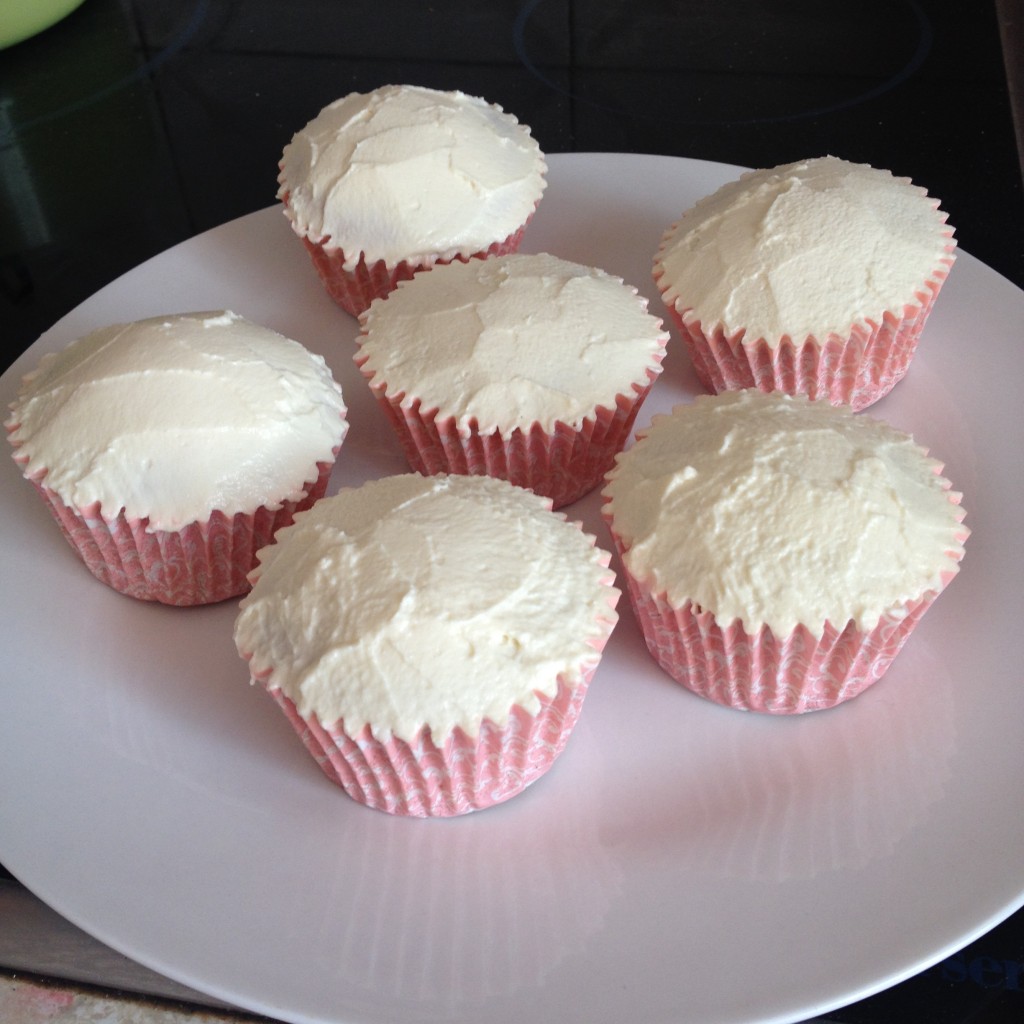
These babies disappeared shortly after this picture was taken
Seriously lush (leftover) Cookies & Cream brownie cupcakes
(makes 12)
Ingredients:
200g unsalted butter
200g dark chocolate (around 70% cocoa solids)
200g sugar
4 large eggs
1/4 tsp salt (fine sea salt preferrably)
2 tablespoons plus 1 teaspoon (20 grams) plain flour
1 packet of Oreos (around 130g)
250ml double cream
1tbsp icing sugar
The mix is just chilling out
Method:
Preheat the oven to 165 degrees celsius. Line a 12-muffin tin with paper cases.
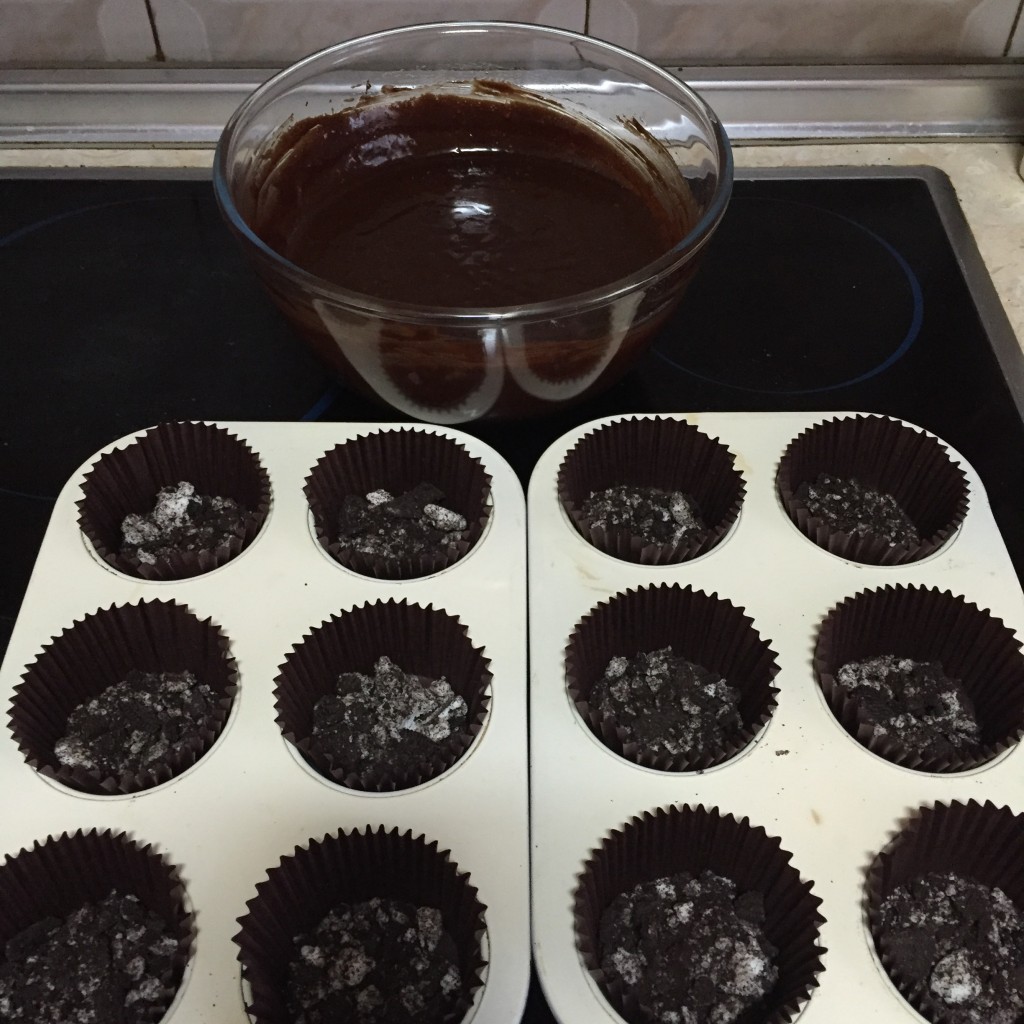
Melt the butter and the chocolate. I prefer doing it over bain marie (over simmering water in a heat proof bowl) but you can do it in the microwave. Just be careful not to burn it in the microwave – put it in for 15 to 30 seconds, stir well and repeat till all melted. Add the sugar which will cool it down. Then whisk in the salt and the eggs, one a time mixing well between them. Stir flour in and then cover with clingfilm and let is rest for about half an hour, this will thicken the mix. While it’s sitting in the bowl, crush Oreos (I bash them in a ziplock bag with a wooden rolling pin) – but not too finely, make sure you have small chunks and not just breadcrumbs. Split the crushed Oreos in the muffin cases (it’s about a tablespoon in each). Whisk double cream with icing sugar till soft peaks form (you can do it by hand but I recommend using an electric mixer so that your arms are not sore after).
When the mixture has sat for 30 minutes or so, scoop it into the muffin cases. Bake for around 25 to 30 minutes, but make sure you don’t overbake as you want them to be a little gooey still. Look for no batter on a toothpick but wet crumbs! Let them cool completely, then pipe cream on top and enjoy!
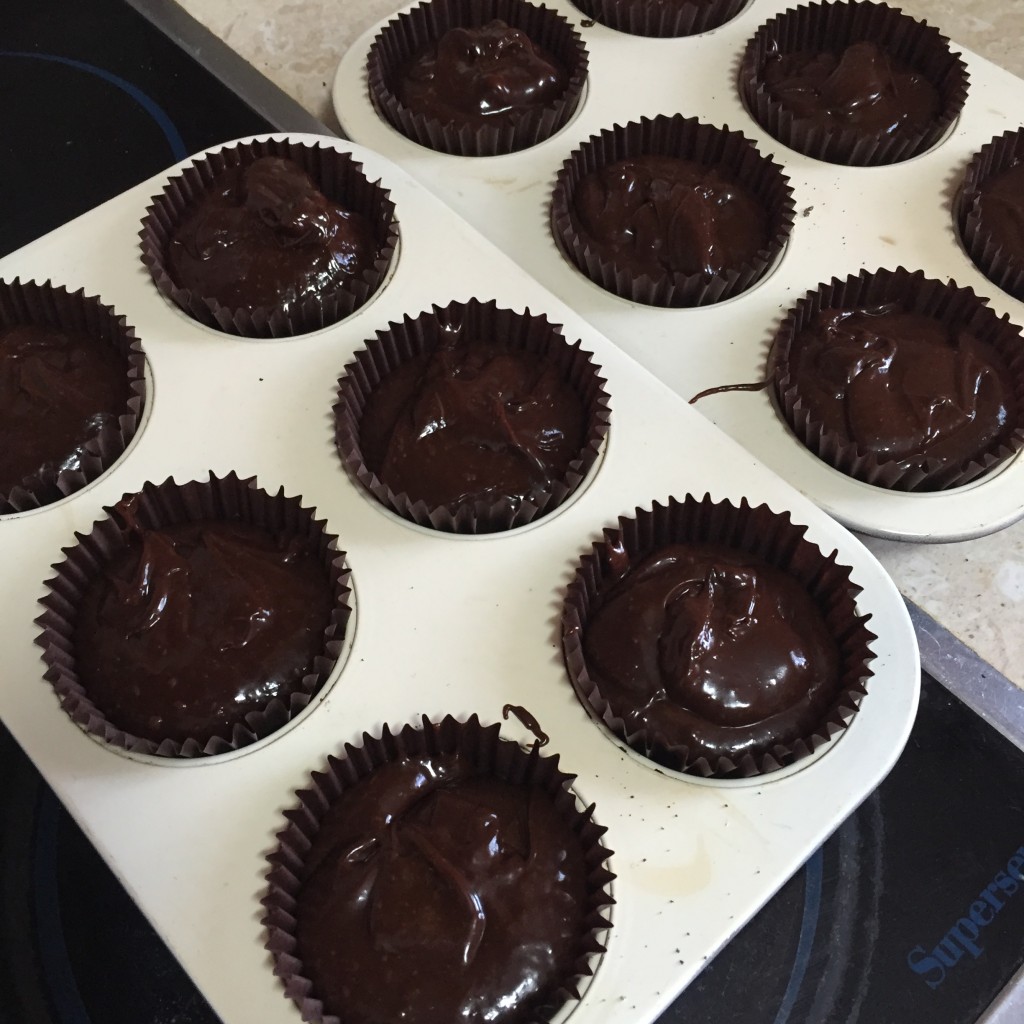
Before they went into the oven


 Once this was done, I brushed a little